Sand or silt, clay or ant hill soil, cow dung, ash, water. For the chimney, grass and metal sheet or
banana stem (Refer to Annex 1: How to make a chimney).
Mixing ratios
One part of clay is mixed with thee parts of
sand.
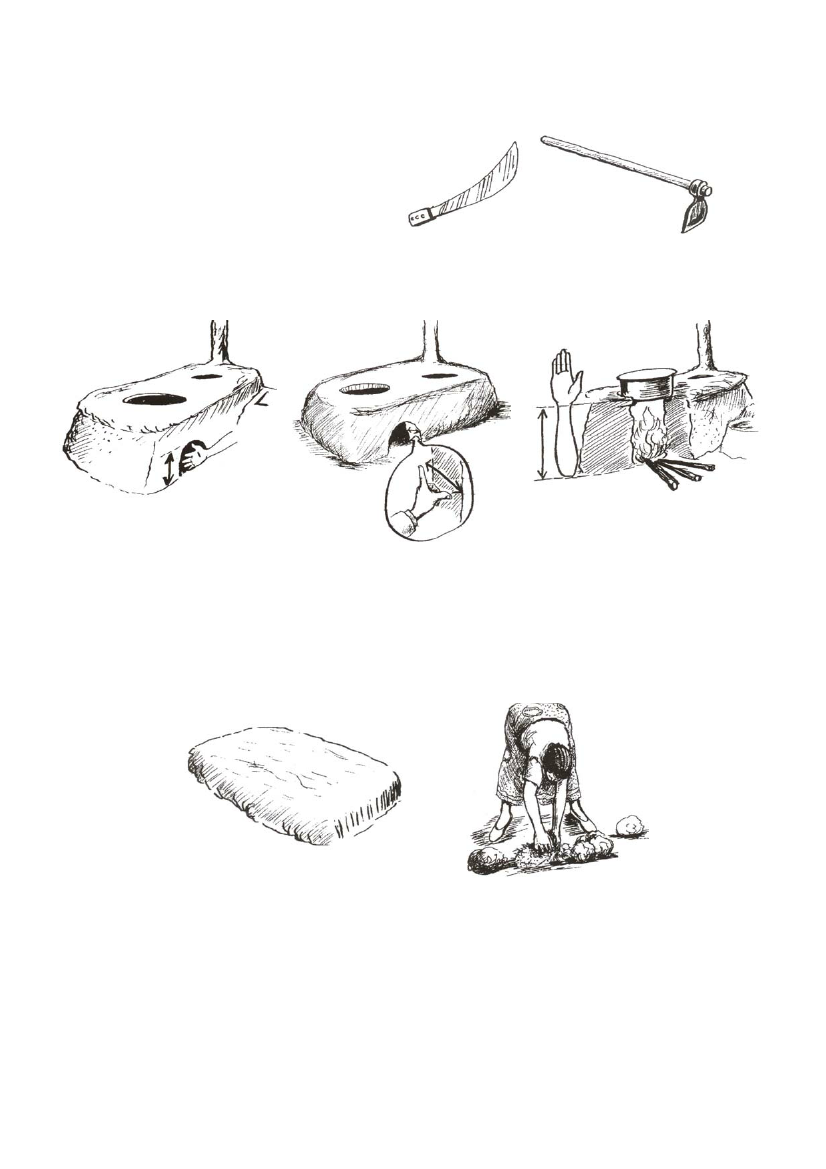
Tools commonly used
Hoe bucket, knife and panga.
Dimensions
Figure 5.20 A panga and a Hoe
The door height should be equal to the width of your palm from the tip of the thumb to the small finger
with the fingers slightly spread. The thickness of the walls should be equal to the width between the tip
of the thumb and the first finger with the two spread out.
Figure 5.21 The door height
Figure 5.22 The thickness of the walls
Figure 5.23 The depth of the stove
The depth of the stove should be equal to the length from the elbow to the base of the palm or three-
quarters the diameter of the most commonly used sufuria.
How to make the Lorena stove
1. Level the ground where the stove will be built and prepare a platform of a suitable height using
bricks or stones. This is optional.
2. Mix the materials together, adding water gradually until it becomes sticky and easy to work.
Make the mud into balls to expel the air. This will prevent cracking.
Figure 5.24 The platform of the Lorena stove
Figure 2.25 Mixing the materials
3. Measure the size of the stove and the diameter of the pot holes using the sufurias that are
most commonly used for cooking. Use your two palms to space the pot holes
4. Heap the mud balls until the required height is achieved.
5. Use the sufurias and your palms again to mark the pot-hole positions on the mud platform.
14